|
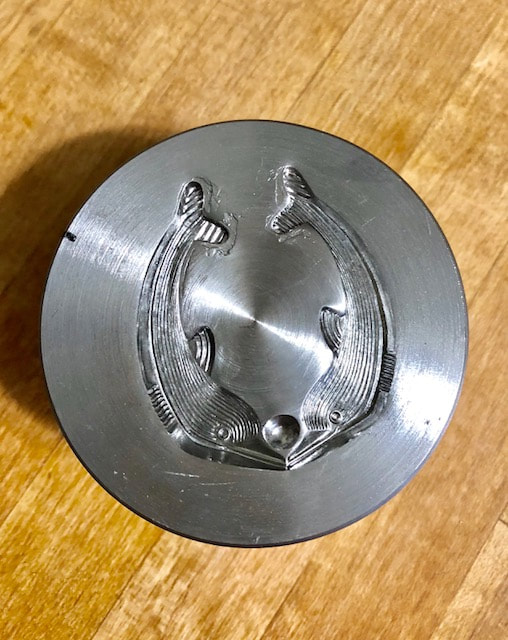
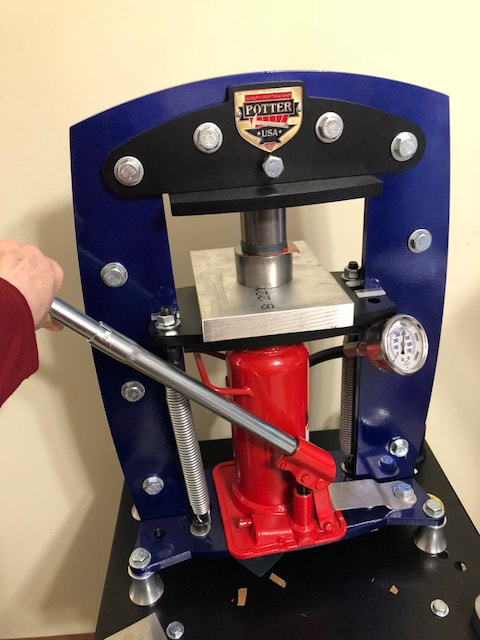
4/6/2018 1 Comment My New Hydraulic Press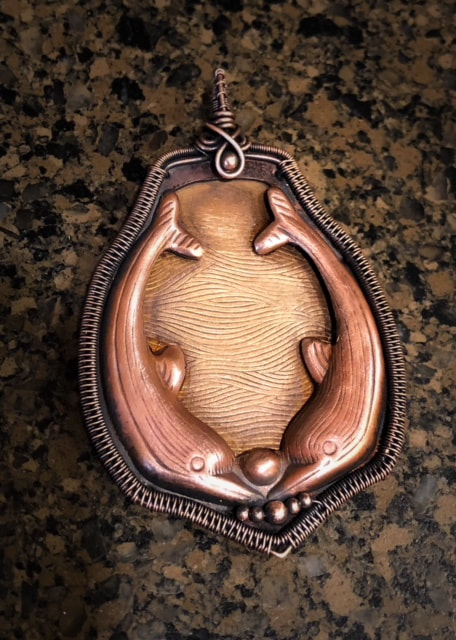 Big new machines are pretty scary out of the box, especially if you never tried them before purchasing. Yet, what is intriguing to me is what these machines are capable of producing at the hands of the metal artist. I remember that first time I purchased my first torch. Having no experience with the torch, I looked to the Internet on how to use the torch. I purchased the appropriate supplies and began torching metals and wires. It was at that time a door had opened to creative possibilities. The next tool that allowed me to push my creative limits was the rolling mill. The rolling mill sat in the room unused for months before I had the courage to use it, because I couldn’t find anything on the Internet on how to use it. I made a promise to myself that once I became comfortable using the rolling mill that I would write my first step-by-step tutorial on how to use the economy compact rolling mill. While I was certainly no expert, I was able to write about what I had learned through my own trial and error. That free tutorial can be found here. Writing that tutorial allowed me to find value in writing and sharing. I have since written other tutorials, publications in magazines and a wire weaving book. My next new journey is the purchase of a hydraulic press, actually, it was a gift from a super cool family member. Like the rolling mill, there is a learning curve, but this tool allows for another new door to open to possibilities when working with metals, leather and wire. I am still learning about my new press, designed by Potter USA, and as I make new discoveries I will share them with you all. In full disclosure, my process is more self-taught and may deviate from tried and true educational websites. Thank you all so much for taking time to read these blogs and walking with me on this artistic journey. Here is the first piece that I made in my hydraulic press. Photo 1: The thing that I find most fascinating about the press is the ability to compress metal into a dimensional shape by the use of the hydraulic press and an impression die. Here is the impression die used for this project.
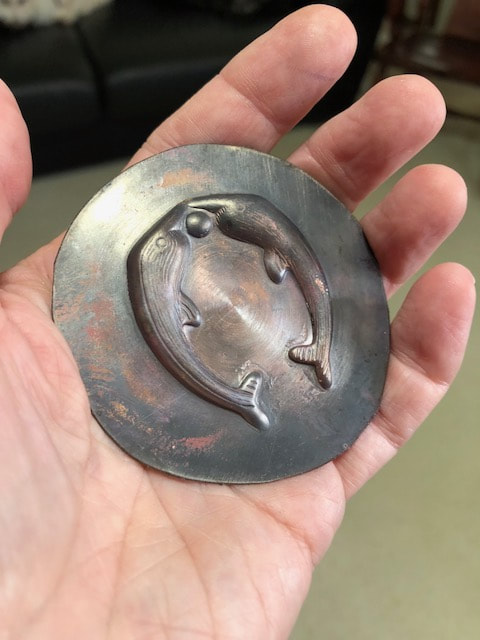
Photo 2: 20-gauge annealed copper is placed on top of the die and the die is topped with pieces of urethane in 95 durometer (durometer is the hardness of a material). These are placed in the press and I ratchet a jack to raise the platform of the press to compress the metal into the die. The metal is removed and annealed again, as the compression renders that metal hardened. The process is completed a few more times; compress, anneal, compress anneal. Photo 3: The urethane allows a cushion between the metal and the hydraulic press so the metal can be displaced into the die. Photo 4: The metal is removed and inspected after each cycle to see if the impression is complete. Here the metal needs to be annealed and the cycle repeated to give a more defined impression. Photo 5: Once the impression is completely defined, the inside of the shape is removed with a jeweler’s saw and an outer perimeter is left, holes drilled into that outer perimeter and a wire frame is added to the outer perimeter and a backing brass plate that was rolled with a design through the rolling mill.
1 Comment
Elena Pérez Hervás
3/19/2019 02:49:52 am
Love it!! Thank you for sharing Leave a Reply. |
About the Wired Lotus BlogProject previews, inspiration, ideas and the latest news from Wired Lotus. ArchivesCategories |


 RSS Feed
